SpringBoot Environment
在SpringBoot中,每个ApplicationContext都有相应的环境信息,比如AbstractApplicationContext中就有private ConfigurableEnvironment environment; Environment 可以理解为一些环境上下文,也就是存储了当前运行环境的各种属性。
下面就看看Environment到底是什么,以及在初始化的时候,他做了哪些相关工作。
背景类介绍
Environment && PropertyResolver
我们常使用的Environment就是StandardServletEnvironment ,那么首先我们就看看该类的体系结构。
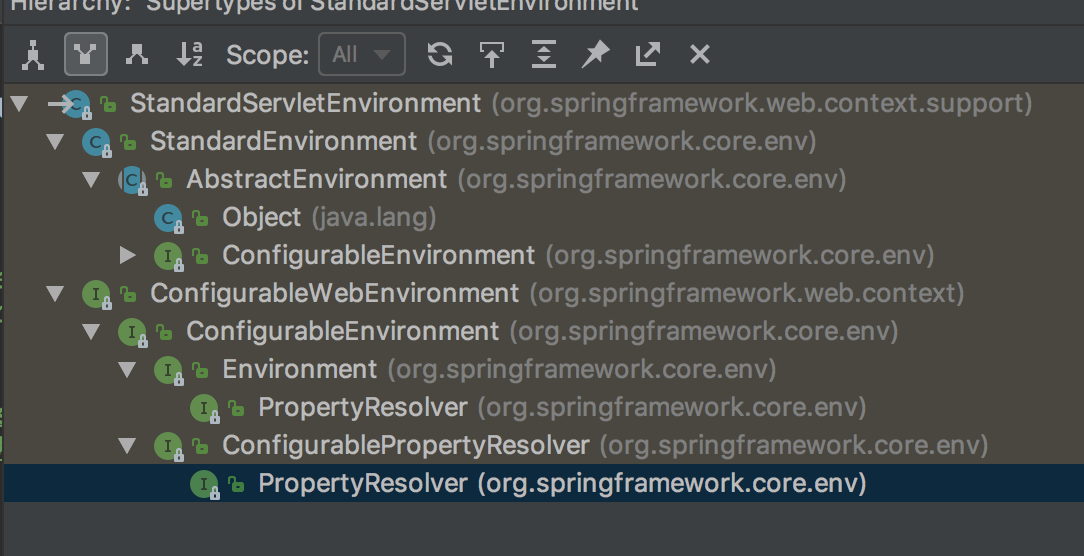
可以看到,StandardServletEnvironment 继承自 StandardEnvironment,实现了ConfigurableWebEnvironment接口。而再往下还有很多的接口定义和抽象类,下面我们都来看看。
PropertyResolver提供了访问属性的接口定义,忽略底层resource的实现。Environment继承自PropertyResolver,提供访问和判断profiles的功能。ConfigurablePropertyResolver继承自PropertyResolver,主要提供属性类型转换(基于org.springframework.core.convert.ConversionService)功能。定义了get|setConversionService,setValueSeparator,setPlaceholderPrefix|Suffix等方法,就是丰富了解析的功能。ConfigurableEnvironment继承自ConfigurablePropertyResolver和Environment,并且提供设置激活的profile和默认的profile的功能。ConfigurableWebEnvironment继承自ConfigurableEnvironment,并且提供配置Servlet上下文和Servlet参数的功能。AbstractEnvironment实现了ConfigurableEnvironment接口,提供默认属性和存储容器的定义,并且为子类预留可覆盖了扩展方法。StandardEnvironment继承自AbstractEnvironment,非Servlet(Web)环境下的标准Environment实现。StandardServletEnvironment继承自StandardEnvironment,Servlet(Web)环境下的标准Environment实现。
如果有不是特别清楚的,可以结合代码看看每个类中方法的定义,就可以理解上面各个类的功能了。
PropertyResource
在AbstractEnvironment中,用来保存环境中各种属性的就是MutablePropertySources。下面从MutablePropertySources入手,了解整个PropertyResource
1 | /** |
下面再看看 PropertySources
1 | /** |
最后看看PropertySource,这里面还是有点东西的。
1 | public abstract class PropertySource<T> { |
这个PropertySource类和map这种的用来存储键值对的类稍微有一点不一样,PropertySource中的source是随意类型的,而且key-value都是存在source里面的。可以简单的看一下常用的两个实现MapPropertySource,
1 | public class MapPropertySource extends EnumerablePropertySource<Map<String, Object>> { |
最后,我们知道AbstractEnvironment中存储的是MutablePropertySources, 是一个数组,那么在Environment中怎么getProperty的呢?
1 | public abstract class AbstractEnvironment implements ConfigurableEnvironment { |
源码分析 Environment 的初始化过程
入口点在SpringApplication.run方法的ConfigurableEnvironment environment = prepareEnvironment(listeners,applicationArguments);。
1 | // environment 在该方法中完成整个初始化 |
1. createEnvironment
首先根据不同的 applicationType 创建不同的Environment,这里创建的是 StandardServletEnvironment
1 | private ConfigurableEnvironment getOrCreateEnvironment() { |
之前说过,StandardServletEnvironment extends StandardEnvironment, StandardEnvironment extends AbstractEnvironment。所以创建StandardServletEnvironment实例,首先会执行父类AbstractEnvironment的构造方法(因为这里子类没有实现构造方法),它里面又调用了customizePropertySources方法,StandardServletEnvironment实现了该方法,所以又会回来调用这个方法。
创建StandardServletEnvironment实例的代码会按照代码实际的执行顺序,在下面罗列出来。
1 | // AbstractEnvironment |
为什么要用SubPropertySource占位,而且还要注意顺序呢?
会想一下,Environment.getProperty 的过程,是扫描数组中的每一个PropertySource看是否有该property,所以也会涉及到这几个环境优先级的问题。
2. configEnvironment
1 | protected void configureEnvironment(ConfigurableEnvironment environment, |
所以他一共干了三件事:
- 初始化
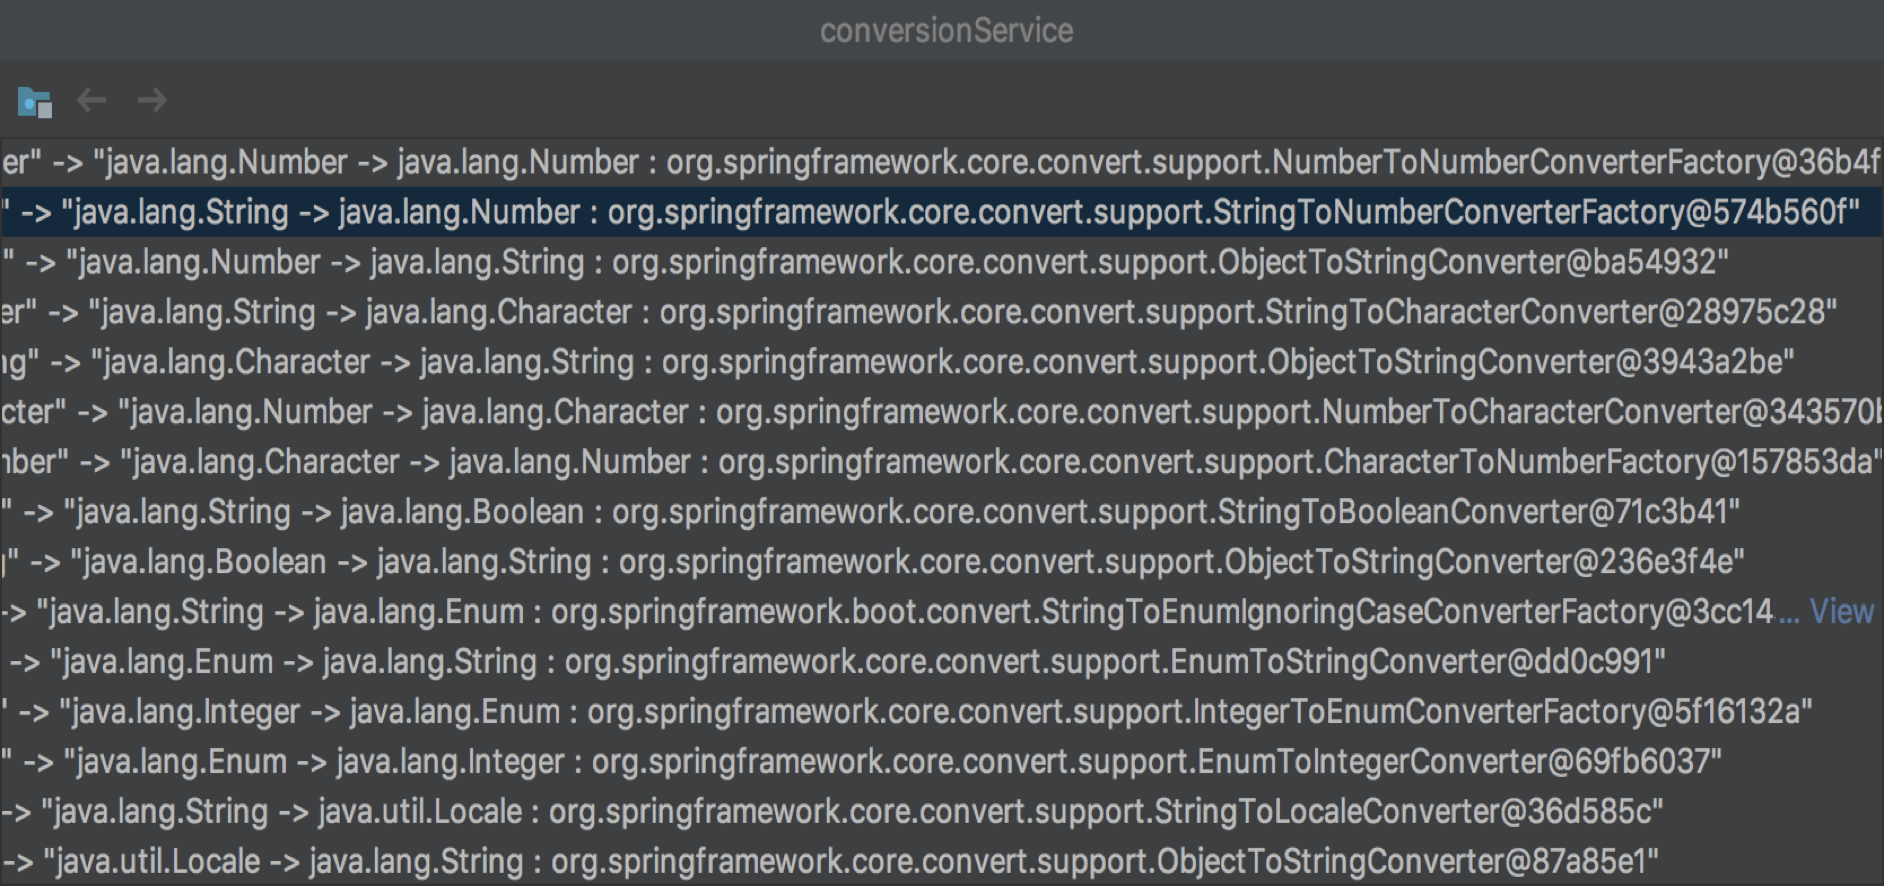
ConvertService - 读取用户运行程序时传入的配置,并保存在Envrionment
- 找到active profiles
下面看看 ConvertService 中 都是什么:

3.1 preLoadProperties
下面就是发出ApplicationEnvironmentPreparedEvent事件。
会有好几个listener,我们关心的是ConfigFileApplicationListener,下面是几个关心的方法:
1 | public class ConfigFileApplicationListener |
3.2 loadProperties
Loader 是 ConfigFileApplicationListener 的内部类。
1 | private class Loader { |
load
1 | // 整个代码逻辑 就是: |
读源码的时候,一开始这里还是读的比较难受的,难受在使用了很多的lambda表达式,并且循环很多。但是 当理解了整个逻辑之后,还是非常清晰的。
以我们当前环境,传入了参数 --spring.profiles.active=wyj
- 第一层循环:profiles=[null, wyj]
- 第二层循环:searchLocation=[classpath:/, classpath:/config/, file:./, file:./config/]
- 第三层循环:searchName=[application]
- 第四层循环:propertySourceLoaders=[PropertiesPropertySourceLoader, YamlPropertySourceLoader]
- 第五层循环:loader.getFileExtensions=[.xml, .properties] or [.yaml, .yml]
最后组织成filename = searchLocation+searchName+"-"+profiles+fileExtension,如果最后解析出来了,就以"applicationConfig: [" + location + "]"为propertySource的名字将他保存在Environment中。
3.3. loadAfter
最后全部配置文件都加载了之后,返回到一开始的load方法。
执行 addLoadedPropertySources() 把刚刚加载出来的属性配置文件添加到envrioment 中。
1 | private void addLoadedPropertySources() { |
从 ConfigFileApplicationListener 中出来,回到 SpringApplication中,就是一个bind,其他的也没什么了。
到此结束。